 INSTALL FREE SSL/HTTPS CERT ON WORDPRESS:
In this post, you will get step by step guide to quickly get https/ssl running on your wordpress site or blog for absolutely free.
Once you follow all the process in the post, you will be able to get the SSL certificate to run smoothly on any wordpress site you have running on any host.
The steps will be made as simply as possible, so any one can reciprocate the same process used to get NIBBLENG running on SSL.
It doesn’t matter which hosting provider you use, the only criterion, is that, your HOSTING PROVIDER SHOULD use CPANEL.
Popular Hosting providers, like, BLUEHOST, SITEGROUND, HOSTGATOR, NAMECHEAP, HOSTGATOR all come with CPANEL.
WHY INSTALL SSL/HTTPS ON WORDPRESS
- Provides secure connection on your wordpress site
- It can speed up your site by working with integration cache programs
- May improve SEO RANKING
- Provides confidence boost for site users and visitors.
There could be other reasons why, you may choose to install SSL/HTTPS on your website not listed above.
Whatever, the reason this post should come handy to provide at least a way to obtain free SSL/HTTPS for WORDPRESS.
What’s Needed to Get SSL/HTTPS using the method in this post
- A computer system running Windows operating system ( Windows 7, Windows Vista, Windows Xp, Windows 8, Windows 8.1, Windows 10)
- Putty Software. Use this LINK to get putty.
- Enable SSH (SECURE SHELL ) on your Host.
- A free VPN app for your Computer (OPTIONAL) may be handy. Get one here, if you like. VPN maybe particularly useful when you are using an internet network provider that uses dynamic changing ip’s to access webpages, so when you try to access CPANEL OR PUTTY SOFTWARE, you get an error because you need a static ip, VPN app makes sure your computer runs on a static ip address.
“Let’s talk about SSH”: SSH provides a kind of alternative path in which you can get access to your wordpress site.
But, this time using TERMINAL. The terminal app is called Putty. You need download and install putty on your computer to access SSH in order to get into your website.
NOTE 1: Some Hosting providers turn off SSH access. For example if you hosting with NAMECHEAP. they turn off SSH ACCESS by default, to turn on the access, you need chat them up.
You can easily do this, by going to namecheap website, locate anywhere you can chat with an agent, then demand that SSH should be turned on.
If you are hosting with GODADDY, you can turn SSH on by yourself, all you need is go to CPANEL, locate SSH ACCESS, and turn on.
Again, if you face any difficulty turning on SSH access, simply call or chat up with the customer care of your Hosting. ok!.
How to Install Free SSL/HTTPS Certificate on WordPress in 54 Steps
Let’s now begin with the installation, get a glass of water and sip, we are going to pass through 54 steps……………..to get SSL/HTTPS running on your wordpress blog.
Use the steps given below, but using your own parameters to get SSL/HTTPS INSTALLED ON YOUR WORDPRESS SITE OR BLOG.
Steps to INSTALL FREE SSL/HTTPS ON WORDPRESS
NB: Your CPANEL design and user interface may look different from the one in this image, just understand the step and carry out your own step according to how the CPANEL is presented.
#1. LOGIN TO YOUR WORDPRESS CPANEL
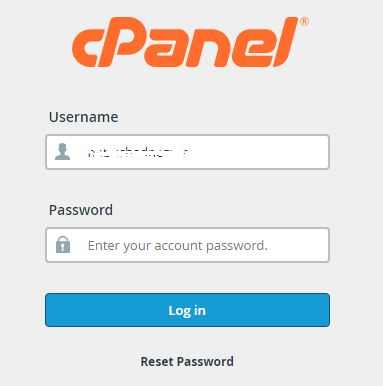
login to your CPANEL using your username and password. Your CPANEL logo design and user interface may be different from this in the image, don’t worry about that, they all accomplish same thing.
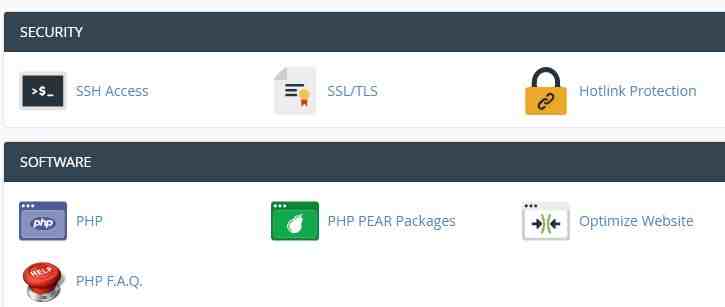
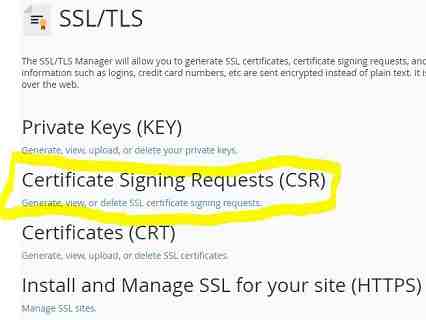
#2. SCROLL AND LOCATE SSL/TLS
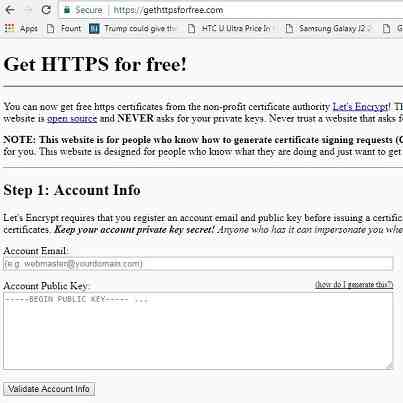
#3. GO TO GETHTTPSFORFREE
- Open another tab in your browser, and go to this url: https://gethttpsforfree.com/
- put your email, that can be easily used to reach you in the field given as, Account Email
#4. Install Putty on your Computer
- Putty Software. Use this LINK to get putty.
- After installing putty open putty
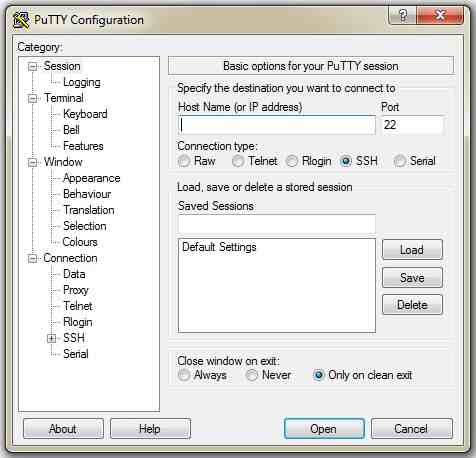
- Under Host Name put your website address. In my case, : nibbleng.com
- Under Port, put your Hosting Port. In my case, it’s NAMECHEAP HOST, which uses port 21098. Therefore, I change the 22, to 21098. If your using GODADDY, the port is 22. You can easily get the port number to use for the SSH by making a Google search like: SSH PORT FOR “HOSTING PROVIDER NAME”. Example, SSH PORT FOR NAMECHEAP.
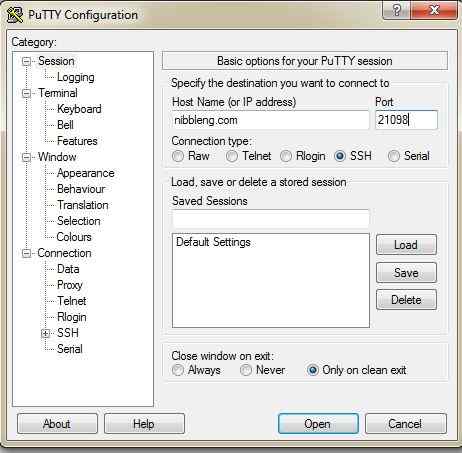
- Click on open to enter SSH
- Login by putting your admin username for wordpress

- Also type your password, when the terminal demands for it. But, this time it’s more like blind typing. Because, you would not notice the terminal responding to your keyboard strokes. You just have to type the correct password, then, hit enter on your keyboard to continue. You can also copy and paste your password to the terminal. To do this is quite tricky: First, copy the password, then when the terminal ask for password, RIGHT CLICK to paste on your mouse then hit enter on your keyboard. That means to paste item into terminal you need to RIGHT CLICK ON THE MOUSE.

- After logging in with your wordpress admin username and password. Copy and paste this and press enter: openssl genrsa 4096 > account.key

NB: To do this step: [After copying, Right click on the Mouse and press enter on keyboard to proceecd]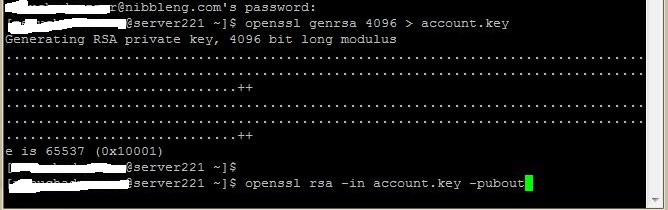
- The terminal will then, generate a private key. After the generation. Copy and paste this: openssl rsa -in account.key -pubout
NB: To do this step: [After copying, Right click on the Mouse and press enter on keyboard to proceecd] this will generate the public key - After generation, highlight with your mouse from …………Begin Public Key…………… to …………End Public Key…………….., then, press Ctrl+C on your keyboard to copy
- Go back to the Gethttpsforfree website page and go under Account Public Key then paste the key copied from terminal into the field
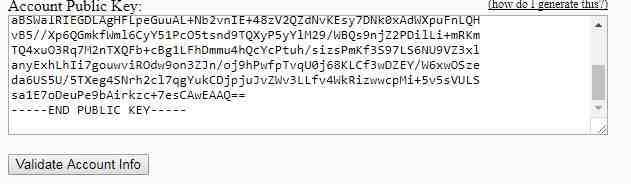
- Click on Validate Account Info. This will bring you forth to the next step with a: “Looks Good”
#5. Generate Certificate Signing Request
To generate certificate signing request, go back to the first tab of CPANEL opened in your browser and go under the SSL/TLS option. Click on the Certificate Signing Requests(CSR) option.
 Then, it leads you to a page where you fill up some data. Under Key leave it as: Generate a new 2048 bit key.
Under Domains, put both non-www format and www format of your domain and separate both with a comma. For Example, in my case under Domains: nibbleng.com, www.nibbleng.com.
Note 2: If your website address redirects to another url. For example if you have former domain which redirects to a new one, you put both the www and non-www format of the old domain and the new domain inside the DOMAINs field.
That means you will have four domains inside of the Domains field. For Example: if your Old domain is getme.com, and getme.com now redirects to getme.com.uk.
You put it like this under Domains field: getme.com, www.getme.com, getme.com.uk, www.getme.com.uk taking cognisance of using commas to separate each of them.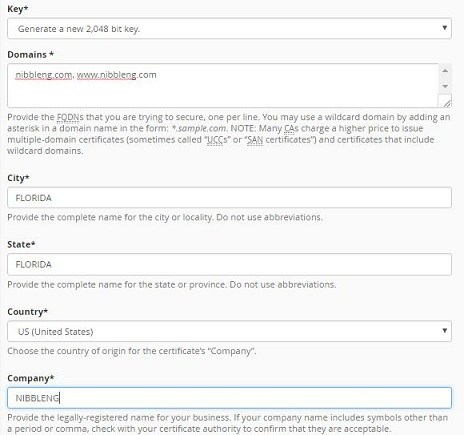 Under City option, put your City address. Sam thing for State and Country and then Company name.
Then hit on the Generate button to produce the CSR key.
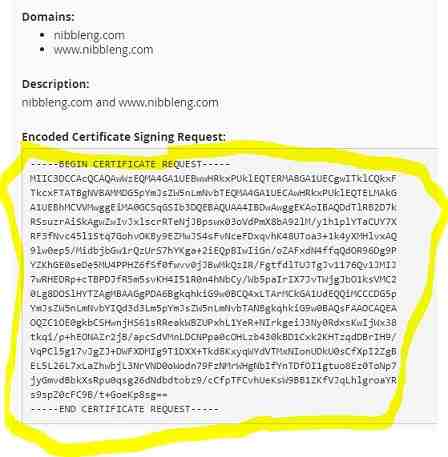
 Voila! all Done, You have now Generated the CSR key.
Highlight and copy the key using your mouse from …..Begin Certificate Request……. to End Certificate Request……..
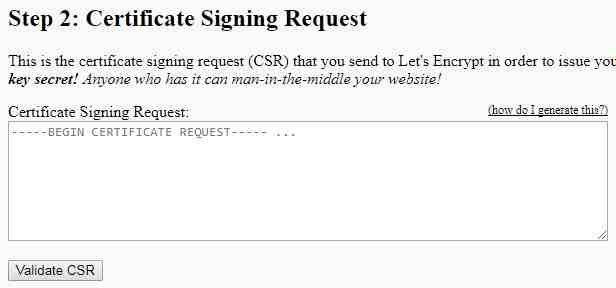
 Now go to the other tab, opened in your browser of gethttpforfree website and paste the key into the Step 2: Certificate Signing Request Field.
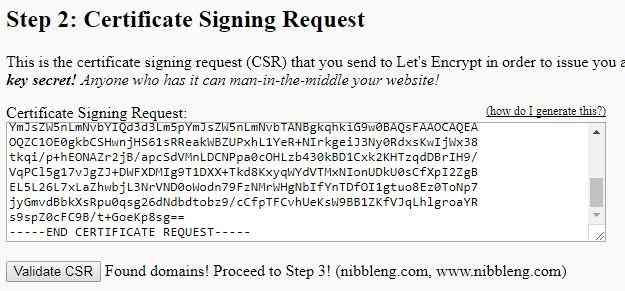 Click on the Validate CSR button. When done correctly, you get a Proceed to Step 3!
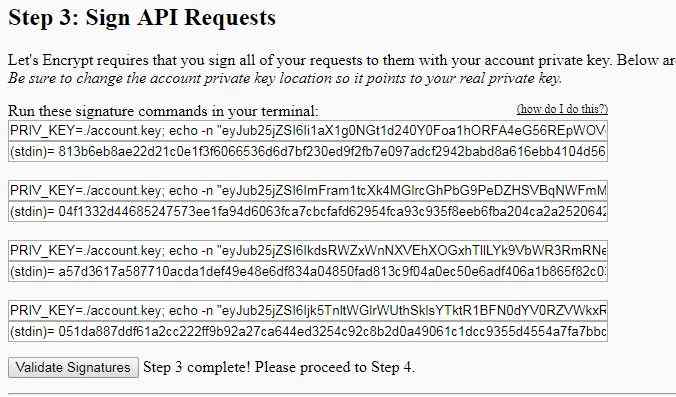
#6. Sign API Requests
 Go to Step 3, in the webpage. Under Run these signature commands in your terminal, copy the key code, given in the field.
You are to generate another key using the key copied using putty.
To do this, open putty in your computer just like explained in Step 4 above.
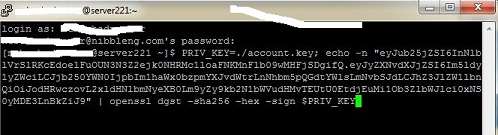 After logging into putty, paste, the code into putty by RIGHT CLICKING, then press ENTER on your keyboard.
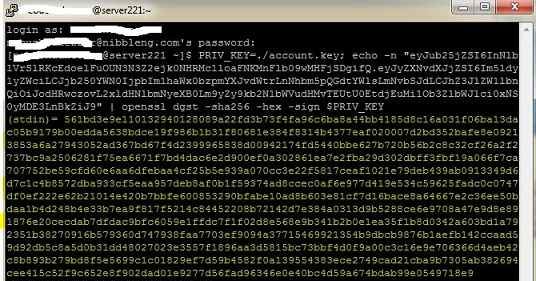 Wait a while for the key to generate. After generation, highlight the key, starting from (stdin) to the end, just like the image above.
Then, paste the key into the empty field. Just like the image below. Repeat the same step, for the remaining 3 Steps.
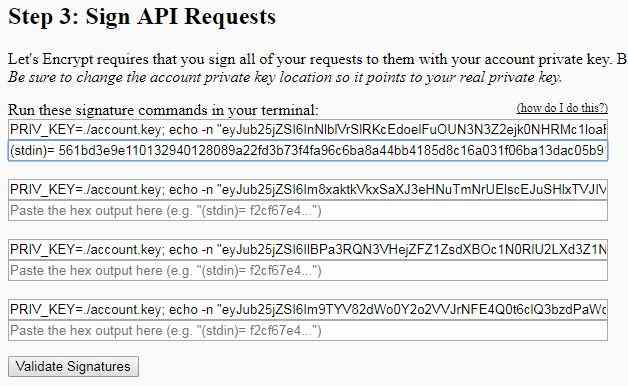 When done correctly! simply hit on the Validate Signatures button to proceed to Step 4.
Note 3:
If there is any mistake with copying and pasting it will take you back to step one.
But don’t worry!, it’s usually fast, you only need to hit on the validation buttons to proceed, since the data is already on the webpage until you get to step 3 again.
#7. Verify Ownership of your Domain
As for my case, will verify both the non-www format of the domain and the www format of the domain.
If your domain redirects to another newer one, it means you will be verifying 4 domains just like the example given in Note 2 above.
Next step is to verify if you are the real owner of the domain, to do this we have to go back to the other tab in web browser of CPANEL.
Before going back to CPANEL, click on the Option 2-File Based under the Step 4: Verify Ownership page.
Verifying non-www. format of domain
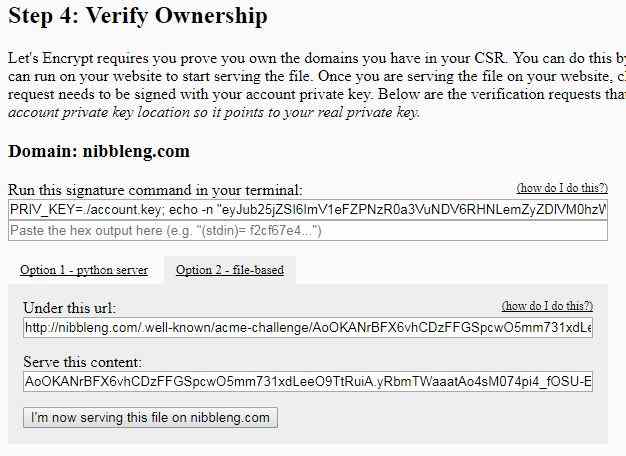 Then above it, copy the Key under the, Run this signature command in your terminal.
Apply the copied key into putty, by opening putty again, if it has lost connection, just as in the previous step.
To generate a key using the copied one, simply Right Click inside Putty and hit Enter on your keyboard as in the previous steps.
Highlight the key from (stdin) to the end, copy it and paste into the empty field under Priv_KEY….. as in the image below.
 Next step is to go to CPANEL. LOCATE FILE MANAGER. ENTER FILE MANAGER.
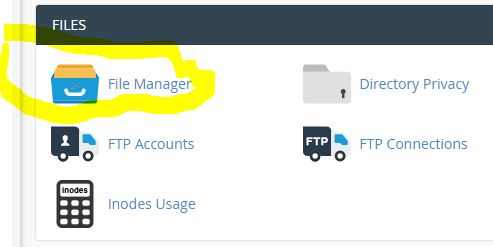 Inside CPANEL File Manager, search for public_html and click on it.
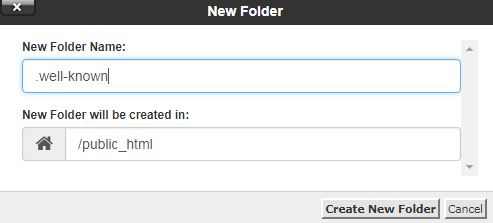
Create a new folder inside public_html with name as: .well-known.
To create new folder search at the top for +Folder option or any option to create a new folder depending on your cpanel design.
 After creating the .well-known folder.
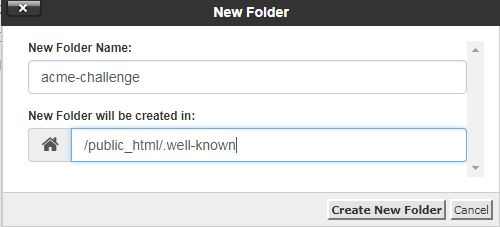
 Click on the folder and open it, Create another Folder inside it, with name as: acme-challenge
 Note 4:
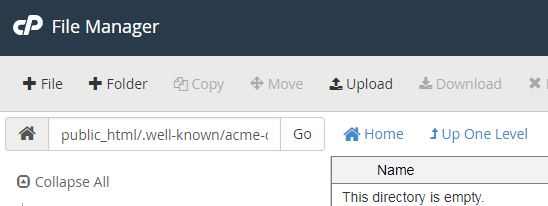
If .well-known or acme-challenge folder becomes invisible in CPANEL UNDER public_html, simply use the search field by typing the name and hit on search to get the folder.
 Open the other tab in your browser on the gethttpsforfree page.
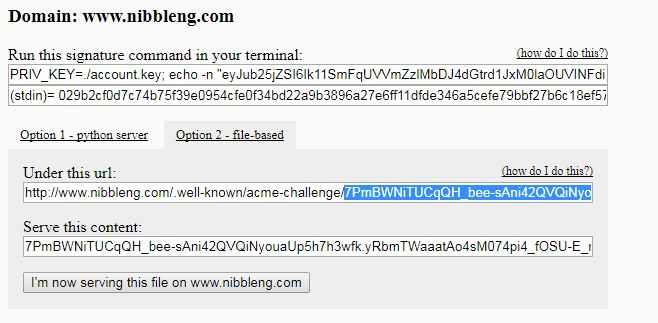
Under the STEP 4, under this url: Highlight the text immediately after the .well-known/acme-challenge/. See image below for example.
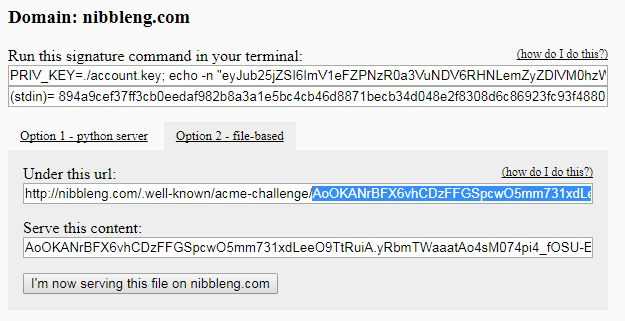 Copy all of the highlighted text to the end and go back inside CPANEL in the other tab in your browser, Inside acme-challenge folder create a new Folder with name you copied by pasting the text, just as you have done previously.
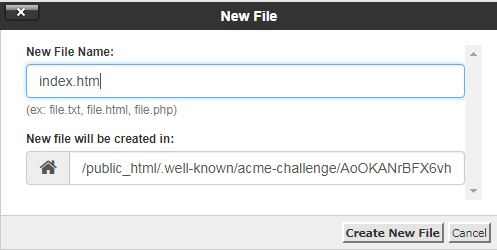
 Now click on the created folder to open it. Inside the folder, create a new FILE inside it as: index.htm.
To create the file, hit on the +File option at the top of CPANEL or any option to create a new file, depending on your CPANEL design.
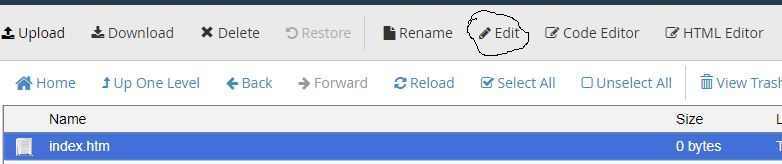 After Creating the File (index.htm), click on the file and use the EDIT option at the top of CPANEL to open the file.
![]()
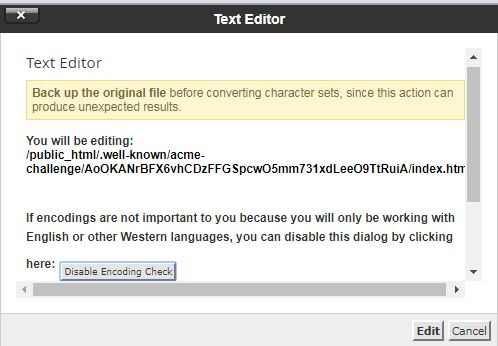
 Click on the Edit option at the bottom when you get a prompt, see image below:
 Next, go back to the other tab opened in your browser on the gethttpsforfree page and in Step 4, go to the option of Serve this content.
Copy all of the text given below it. Then go back to CPANEL again to the index.htm file created in CPANEL.
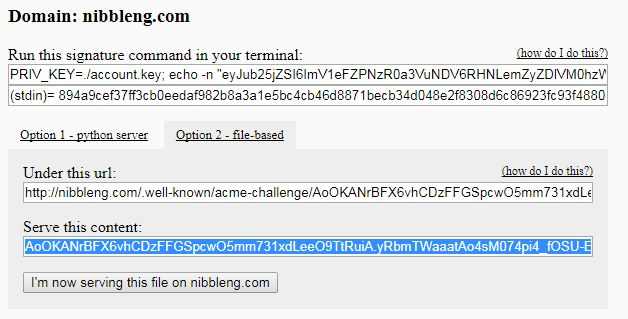 Now paste the copied content into the Index.htm editor field by clicking inside the empty field and save it.
 Finally, go back to the gethttpsforfree page under Step 4 and hit on “I’m now serving this file on “your website name” option button to proceed to the next step.
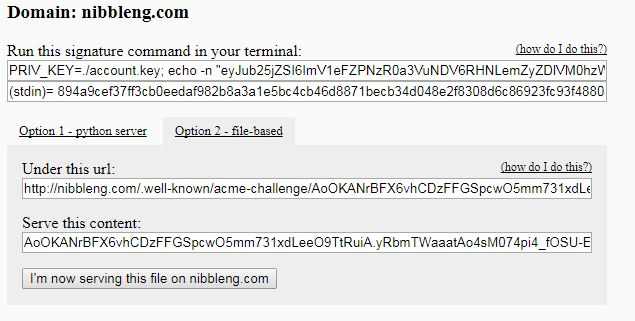
Verifying www. format of domain
You also have to apply same steps applied above, to verify the www version of the domain.
If your domain redirects from an old version to a newer version, you would get four option to apply same procedure done above. In my case it’s only two: non-www and www verification.
I would skip and just provide the finished images below.
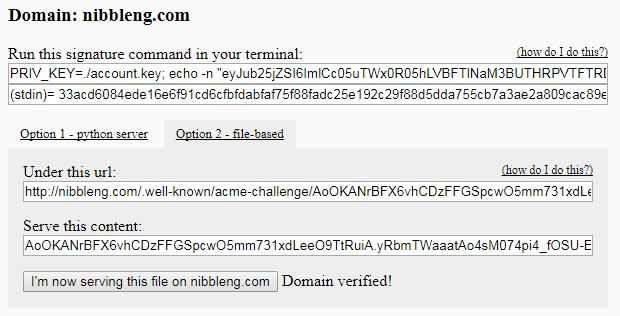 After you have done everything just like in the previous steps shown below to verify the domain hit on the I’m now serving file on “your website name” button to proceed and finish the process.

#8. Retrieve SSL/HTTPS CERTFICATE
On completion of the previous step, after few seconds of the Domain verified! displayed, you get the SSL Certificate auto-generated in Step 5.
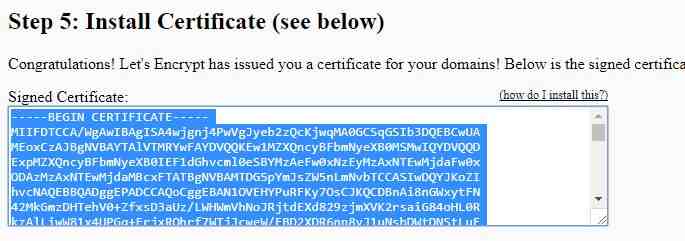
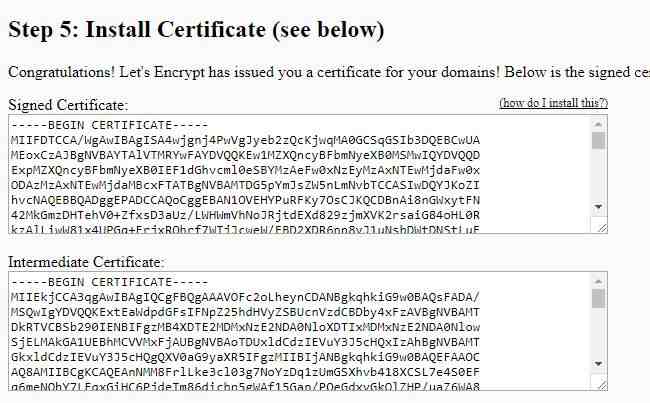 Simply, highlight all the text in the first box field under Signed Certificate and copy it. See image below.
#9. Installing Free SSL/HTTPS CERTIFICATE
After copying the generated SSL/HTTPS certificate, go back to CPANEL. Search for SSL/TLS option.
 Go under Install and Manage SSL for your site( HTTPS) option and click on it to open.
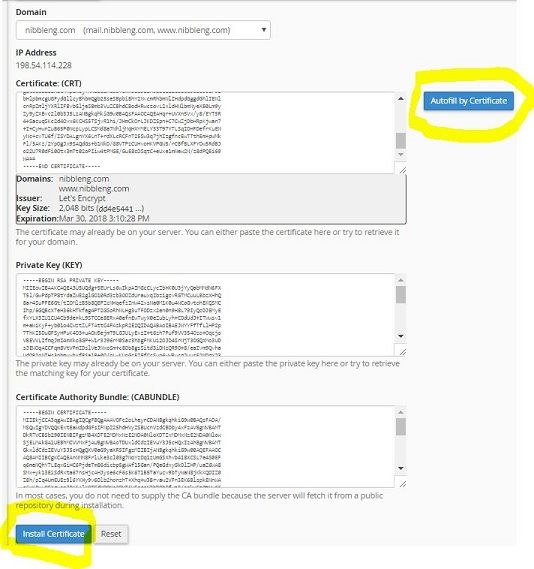
Paste the content copied in the previous step into the first field box with name: Certificate (CRT).
Under the Domain option at the top, select your website domain with both www and non www format. Then click on the Autofill by Certificate option.
And after few seconds, the remaining unfilled boxes will autofill, after that, hit on the Install Certificate option at the bottom of the page to finally install the SSL/HTTPS certificate on your wordpress site or blog.
 Voila! all done! You have finally installed SSL/HTTPS CERTIFICATE on your wordpress.
#10. Check Health of SSL/HTTPS CERTIFICATE
Next step, is to check if everything went fine and your SSL/HTTPS certificate has been installed without any glitches.
To do this we use the online tool: SSL SHOPPER click on the SSL shopper link.
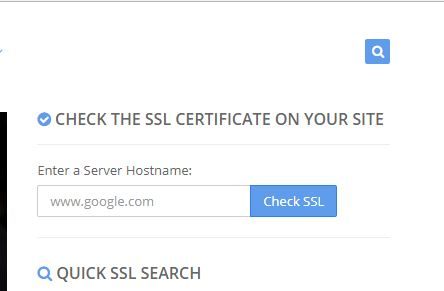
- Inside SSLSHOPER page locate, CHECK THE SSL CERTIFICATE ON YOUR SITE tab.
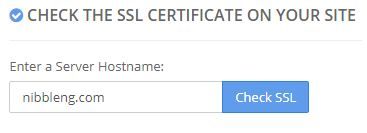
- Type your website address into the empty field and hit on the Check SSL button. You should get something that looks like the image below, you can see everything is up and running in my case:
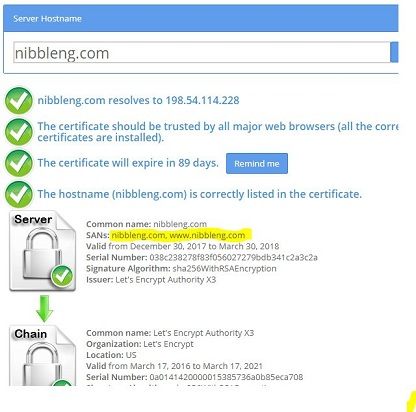
- Also take note, that both the non-www format and www. format of your website is listed under the SANS OPTION HIGHLIGHTED IN THE IMAGE ABOVE.
- If any one is missing, means you missed a step in STEP 5 ABOVE. Means people can’t access www format of your site on SSL. which means you have to delete the installed certificate in CPANEL>>SSL/TLS and create another one and install using same procedure in the post.
#11. Forcing all Elements of WordPress to use SSL/HTTPS
Next step is to make all elements of your wordpress blog or site work with SSL/HTTPS CERTIFICATE. To do this apply two steps below:
Enabling SSL/HTTPS inside WordPress Settings 1:
Go to Settings>>General. Under WordPress Address (URL), change it to this format: https://yoursitedomain in my case its https://nibbleng.com. Apply same procedure for the Site Address (URL) option below it.

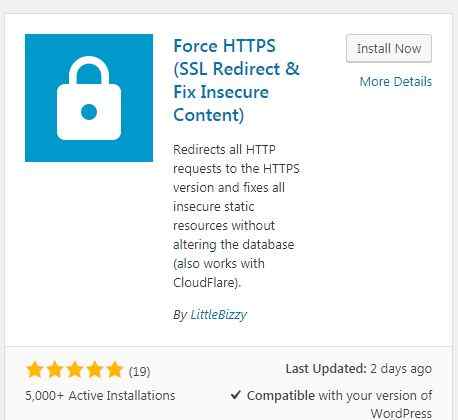
Enabling SSL/HTTPS BY USING PLUGIN 2:
Go to Plugins>>Add New>> inside worpdress dashboard, then search for Force SSL.

Install and activate the plugin.
Voila! You all done.
FINAL NOTE:
Let’s I forgot the title should have been How to install ssl/https in 11 steps on wordpress , just have to trim the number down some how not to scare some people.
The free SSL/HTTPS CERTIFICATE BY LETSENCRYPT IS VALID FOR 3 MONTHS. To renew, you simply, need to apply same step again manually to update the certificate.
Ensure you provide an email that’s active in the first step of the post to ensure you get a reminder when the expiration date approaches.
Again, there is also another method of auto-renewing, the SSL CERTIFICATE, that should come on another post.
Do drop me a comment if you want that to happen real fast. I need take a chill break!. Get myself some tea! catch you up, some other time! Happy SSL’ing. !ok.
Get Stuffs Like this, to Ur' Inbox: